Step 1: choose the spot before anything else
The anchor goes into concrete, so the location is permanent. Goalrilla puts it bluntly in Goalrilla's overhang guide: placement is a decision that is "literally set in concrete". Three things decide it.
- Overhang. That is the distance from the front of the pole to the front of the backboard. Goalrilla recommends roughly 2 to 4 ft for the best balance of safety and performance, and warns that 5 ft or more can add shake. Read the overhang chart for your exact model and height setting.
- Distance from the driveway. Pro Dunk suggests setting the post about a foot off the driveway for most installs, so the board still hangs over the play area while cars and snow plows miss the pole.
- What is underground. Call 811 a few days before you dig so utility lines get marked. It is a free call.
Stand where the free-throw line would be and look up. If the sun sets right behind the board in summer evenings, you will hear about it.
Step 2: what you need on the day
Your hoop comes with the anchor kit (bolts and a template, plus rebar with Pro Dunk). You supply the rest:
- A post-hole digger and a long spade or trenching shovel. A rented auger saves your back on hard ground.
- Concrete mix: Goalrilla recommends 12 to 13 bags (its instructions say 11, the extra is a safety margin), Pro Dunk 15 to 25 bags of 80 lb mix depending on the model. Our concrete guide has the model-by-model figures.
- A wheelbarrow or mixing tub, a hoe, water, a 4 ft level and a tape measure.
- Two or three helpers for the day you raise the board.
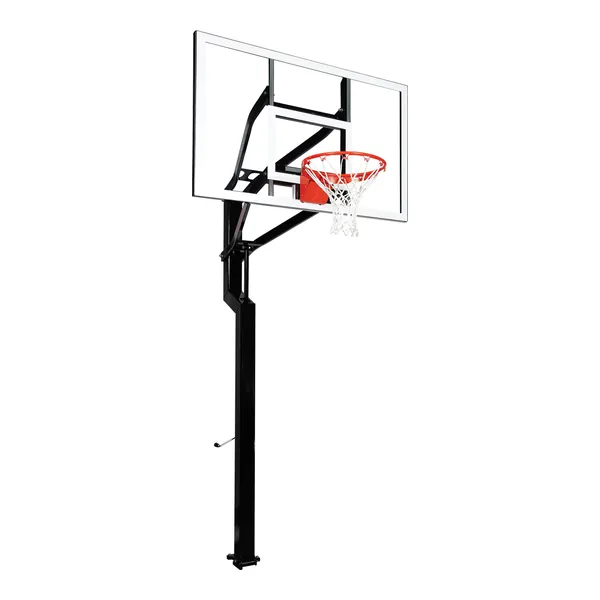
Goalsetter All-American 60
The easiest DIY raise we compare: Goalsetter's Hinged Ground Anchor lets you assemble the whole hoop on the ground and tilt it up, no ladders.
9.0/10Excellent · $2,599.99 at Goalsetter, checked Nov 12, 2026
Step 3: dig the hole
Hole size depends on the hoop. Pro Dunk's installation resources list a 24 inch square hole 4 ft deep for the THOR Platinum and Diamond, 20 inches square and 3 ft deep for the THOR Gold and Silver, and 16 inches square, 3 ft deep for its smaller APOLLO models. Goalrilla, Goaliath and Silverback print theirs in each product manual; read it before you rent the auger.
Keep the sides straight and the bottom flat. In sandy or loose soil, Pro Dunk's advice is simple: do not skimp. A wider, deeper footing is what keeps a 72-inch board from leaning after a few winters.
Step 4: set the anchor and pour
Mix the concrete in small batches. Goalrilla's installation page gives the water: about 6 pints (2.8 L) per 80 lb bag, 4 pints (1.9 L) per 60 lb bag, mixed to an "oatmeal-like" consistency that holds its shape. Too wet and it is weak; too dry and it leaves voids you cannot see.
Fill the hole, working the mix as you pour to drive out air. Set the anchor template so the bolts stand straight with the right length of thread above the concrete (Pro Dunk leaves about four inches), check it with the level in both directions, and do not touch it again. Goalrilla adds a cold-weather rule worth repeating: do not pour into frozen ground, and think twice below 40°F; if you must, use hot water and curing blankets.
Step 5: let the concrete set
This is the hard part with kids watching. Concrete needs time to reach strength before it carries a pole and a glass board. Your manual gives the curing time for your model; follow it, even when the forecast is perfect for a first game. Keep the fresh concrete damp in hot weather and covered in cold weather.
Use the time to unpack, sort the hardware and pre-assemble what the manual allows on the ground. Goalsetter's design goes furthest here: its Hinged Ground Anchor lets you assemble the whole hoop lying down and then raise it, with no scaffold or ladders, per Goalsetter's buying guide.
Step 6: mount, level and raise
Bolt the pole onto the anchor. On Goalrilla-family hoops the nuts under the pole plate are there for leveling: loosen the top nuts, adjust the bottom ones, check the pole with a level on two sides, then tighten everything (Goalrilla's FAQ). Then the backboard. A tempered glass board is heavy and fragile at the edges; this is a two- or three-person job with the hoop at its lowest height.
Finish by setting the height for your youngest player and putting the pole pad on. Pads are included with the Pro Dunk THOR models, the Silverback SB60 and the Goaliath Ignite; on Goalrilla and Goalsetter they are sold separately.
Five mistakes we see in owner questions
Read enough owner questions on maker pages and the same problems come back. Most are about the footing, not the hoop.
- Placing the pole by eye. Overhang changes with the height setting. Measure from the overhang chart, mark the center of the hole, and check it twice before you dig.
- Skimping on concrete in loose soil. Pro Dunk's advice for sandy ground is short: do not skimp. A wider footing is cheap insurance.
- Not checking level until the end. Level the anchor bolts while the concrete is wet. Leveling nuts help later, but they cannot fix a crooked bolt pattern.
- Mounting too early. The curing time in the manual is not a suggestion. A 72-inch glass board on fresh concrete is a lot of leverage.
- Assuming the old anchor fits. One Spalding owner asked if a 60-inch hoop could bolt onto the anchor of an old 54-inch one. Bolt patterns differ by model and brand; Pro Dunk alone uses 4-bolt 7 inch, 4-bolt 9 inch and 6-bolt patterns.
What changes from brand to brand
The steps above are the same everywhere, but the details differ:
- Goalrilla, Goaliath, Silverback SB60: anchor kit with leveling nuts; the hoop can be unbolted later. Goalrilla anchor kits are 9 inches, Goaliath Ignite and SB60 7 inches.
- Silverback NXT: no anchor kit; the pole goes straight into the ground and concrete is poured inside it. Faster, but permanent.
- Goalsetter: Hinged Ground Anchor in 7-gauge steel; you build the hoop on the ground and tilt it up.
- Pro Dunk: pier kit with bolts, template and rebar; you supply only the concrete.
- Spalding U-Turn: a ground sleeve set in concrete; the 4 inch pole drops into it.
Pick the system that suits your helpers and your plans: if you might move in five years, an anchor you can unbolt is worth having. Compare them side by side in our comparison tool.
When to hire a pro instead
If you have rocky ground, no helpers, or a 72-inch glass board, an installer is money well spent. Pro Dunk keeps a list of vetted installers and says the average price is usually around $500 to $600 (its product pages show an average of $700). Goalrilla points to its dealers and to Assembly Help, a national network of independent contractors. Our installation cost guide breaks down the full budget.
Our three picks for this guide
Scores come from our published formula; the full list is in the ranking.